
Next.js
As I heard about Next.js, it was version version 10 and I felt that this was a bit special because I battled a lot with React.js and SEO (2nd version of JobNinja Frontend was in React.js and it was really not working well with bots nor SEO).
It is only in November 2020 that I found time to start a project using Next.js. This project was about creating multiple sites with different designs and different domains taping the JobNinja API: i.e. https://stelleninmünchen.de/ and https://ingenieure-wollen-jobs.de/.
I found the experience pretty cool and pushing the project to Vercel went very smooth.
Ghost
I heard about Ghost CMS during their crowdfunding campaign (2013) in my period while I was fascinated by Kickstarter and checked it almost everyday. I have been using it for the JobNinja Blog as well as for the startup of one of my very best friend: brili. I find the admin interface very easy to use and the template engine is super intuitive (handlebars) and they have a headless CMS functionality (it means that you do not need to use the frontend from the CMS, you can retrieve the content via API and create your frontend)
Architecture
Based on the facts that I really like these 2 technologies, I wanted to combine the best of both to create my developer blog. And I found a super useful repository: https://github.com/styxlab/next-cms-ghost. This Next.js app is amazing: it uses the content API of Ghost to retrieve the URLs and the content of a Ghost instance and it passes the data to the getStaticPaths and getStaticProps of Next.js so that we can leverage the SSG of Next.js!
Here is an overview of the architecture of this blog:

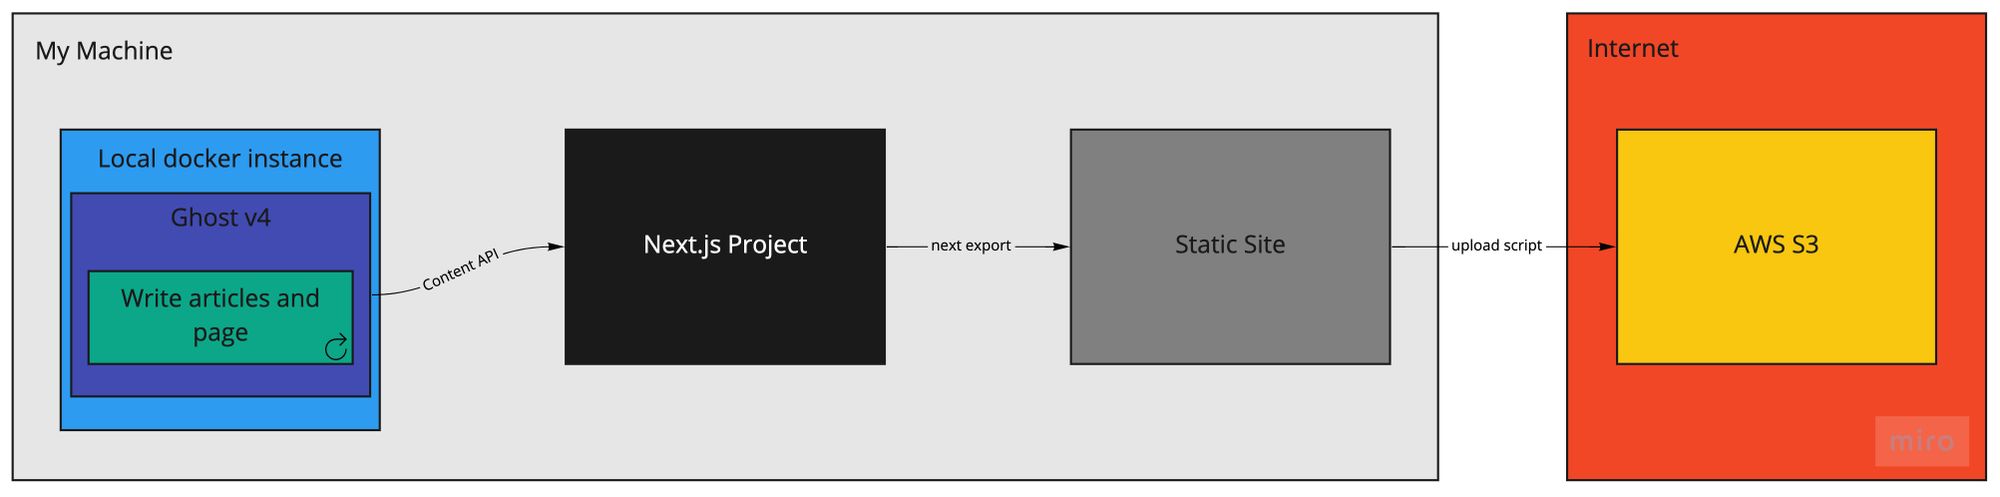
What are the advantages of this architecture?
- it is super easy to deploy, it creates a folder with an
index.htmland you can push it to every server hoster in the world. - your Ghost instance is not exposed to the internet, it stays secure on your machine/your intranet.
- You leverage the speed of Next and its great performance optimisation as advocated on the project repo:

- you can customise every detail of your website in React and do not need to deal with handlebars at all, this project is recreating the casper theme with all its details!
Tutorial
For this tutorial, we follow the architecture schema from left to right.
Install docker image of Ghost
We need to run ghost locally and the best way to do it without having to care about any dependency problem is to take the official ghost docker image.
docker run -d --name myBlog -p 2368:2368 -v /mypath/ghostdata:/var/lib/ghost/content ghost:alpine
Now if you go to http://0.0.0.0:2368/ghost/, you should be able to access your ghost instance.
UPDATE: From release 5.9 ghost uses MySQL by default. So either use 5.8 or have a look at this post.
Run the Next.js project
In order to use and maybe modify the casper Next.js theme, we need to clone it. Here we go!
git clone git@github.com:styxlab/next-cms-ghost.git
cd next-cms-ghost
yarn install
Connect Next.js and Ghost
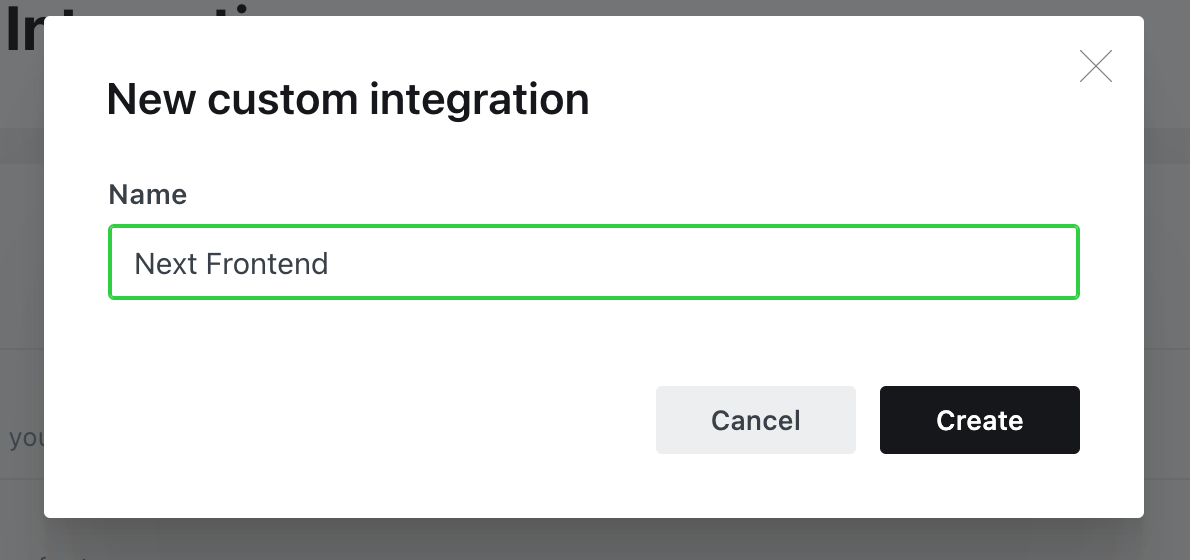
To grant the access to the Ghost Content API, you need to register a custom Integration.
- Go to http://0.0.0.0:2368/ghost/#/settings/integrations
- Click on "Add custom integration"
- Call it whatever you prefer
- You should get your credentials to connect Next.js and your Ghost instance.


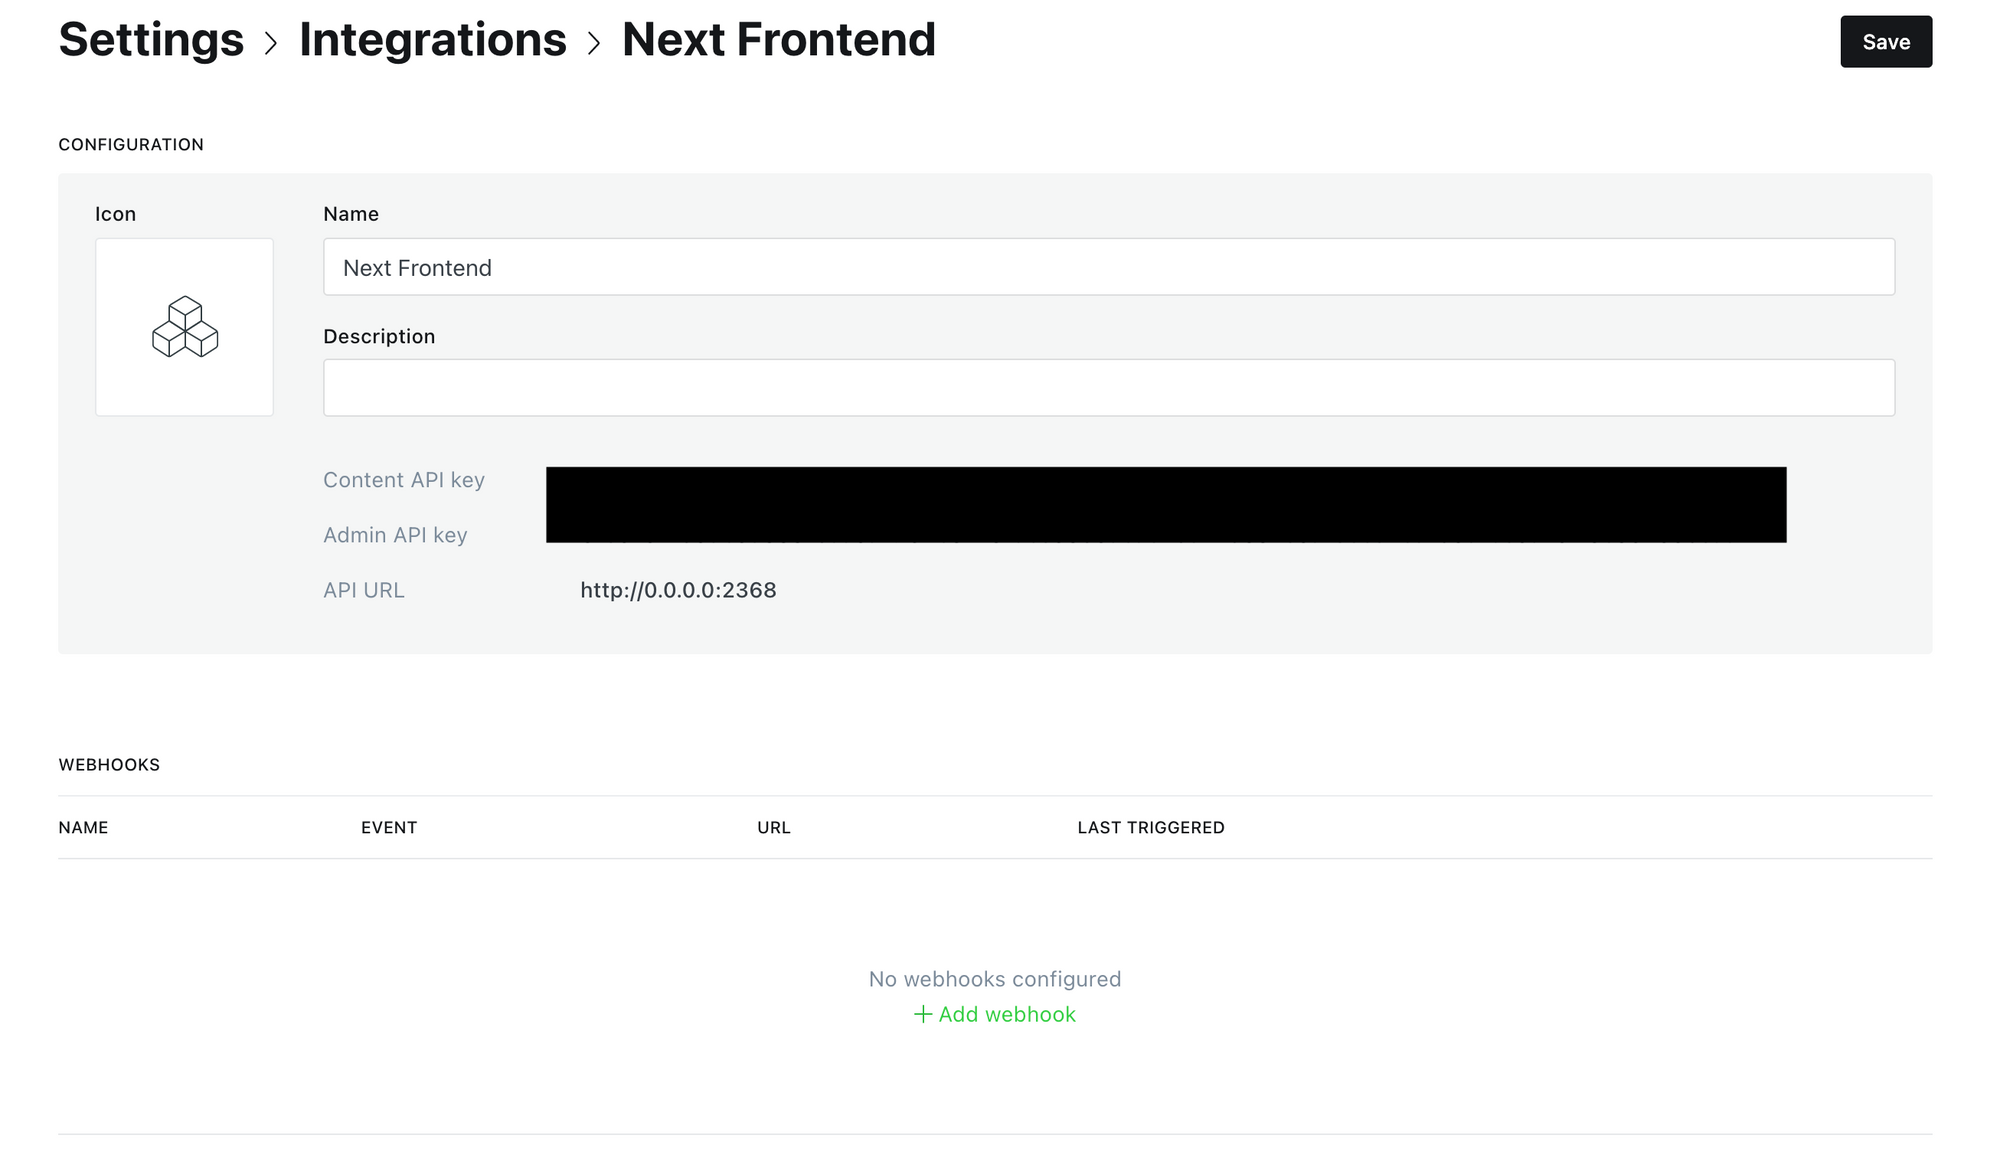
With the newly acquired credentials, we can add a file called ".env.local" to the root of the cloned repo to connect the Next.js project to the Ghost instance. In our case it will look like this:
CMS_GHOST_API_URL=http://localhost:2368
CMS_GHOST_API_KEY=<yourkey>
Export
If everything went smooth, you should be able to export your project to a static website. If you take a look at the package.json of the cloned project, you will see:
"export": "cross-env IS_EXPORT=true next build && next export",
This means that we can just type something like and we should get what we want.
yarn export
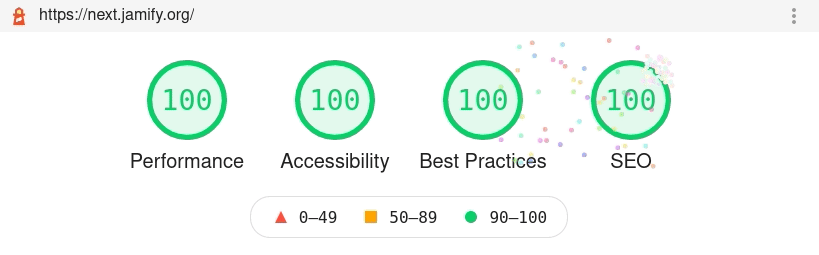
Result
The yarn command creates a folder in the root of the project called "out". If you serve this folder (I use python3 -m http.server 3000), you should see your next.js static blog:

Disclaimer
The export of the original github project is not completely independent of the ghost instance: it relies on it for the media (mostly images) and is unable to render few components correctly as github gist or youtube videos.
So I forked the project and customised it for my needs. This work is open-source and I hope that it can serve as exploration for the original repo (the quality of my "improvements" is probably not production grade). My repo is available at https://github.com/laurentmmeyer/next-cms-ghost
Conclusion
I'm really happy with the frontend architecture of this blog and writing articles for it has been great fun. In the next post, we will explore how I deployed it to AWS S3/Cloudfront/Route 53.